 Valhalla VintageVerb
 Subtotal: $50 USD
ValhallaPlate: The Controls


ValhallaPlate was designed from the outset to be easy to use, and to sound good with basically any parameter settings. This is a natural consequence of being inspired by plate reverbs. An EMT140 usually had between 1 and 2 parameters (decay time, and sometimes a highpass filter on the input jack of the plate). The goal of ValhallaPlate was to expand upon the possibilities of physical plates, while keeping the simplicity of plates.
A quick rundown of the controls (GUI picture added for reference, and because I think it’s purty):
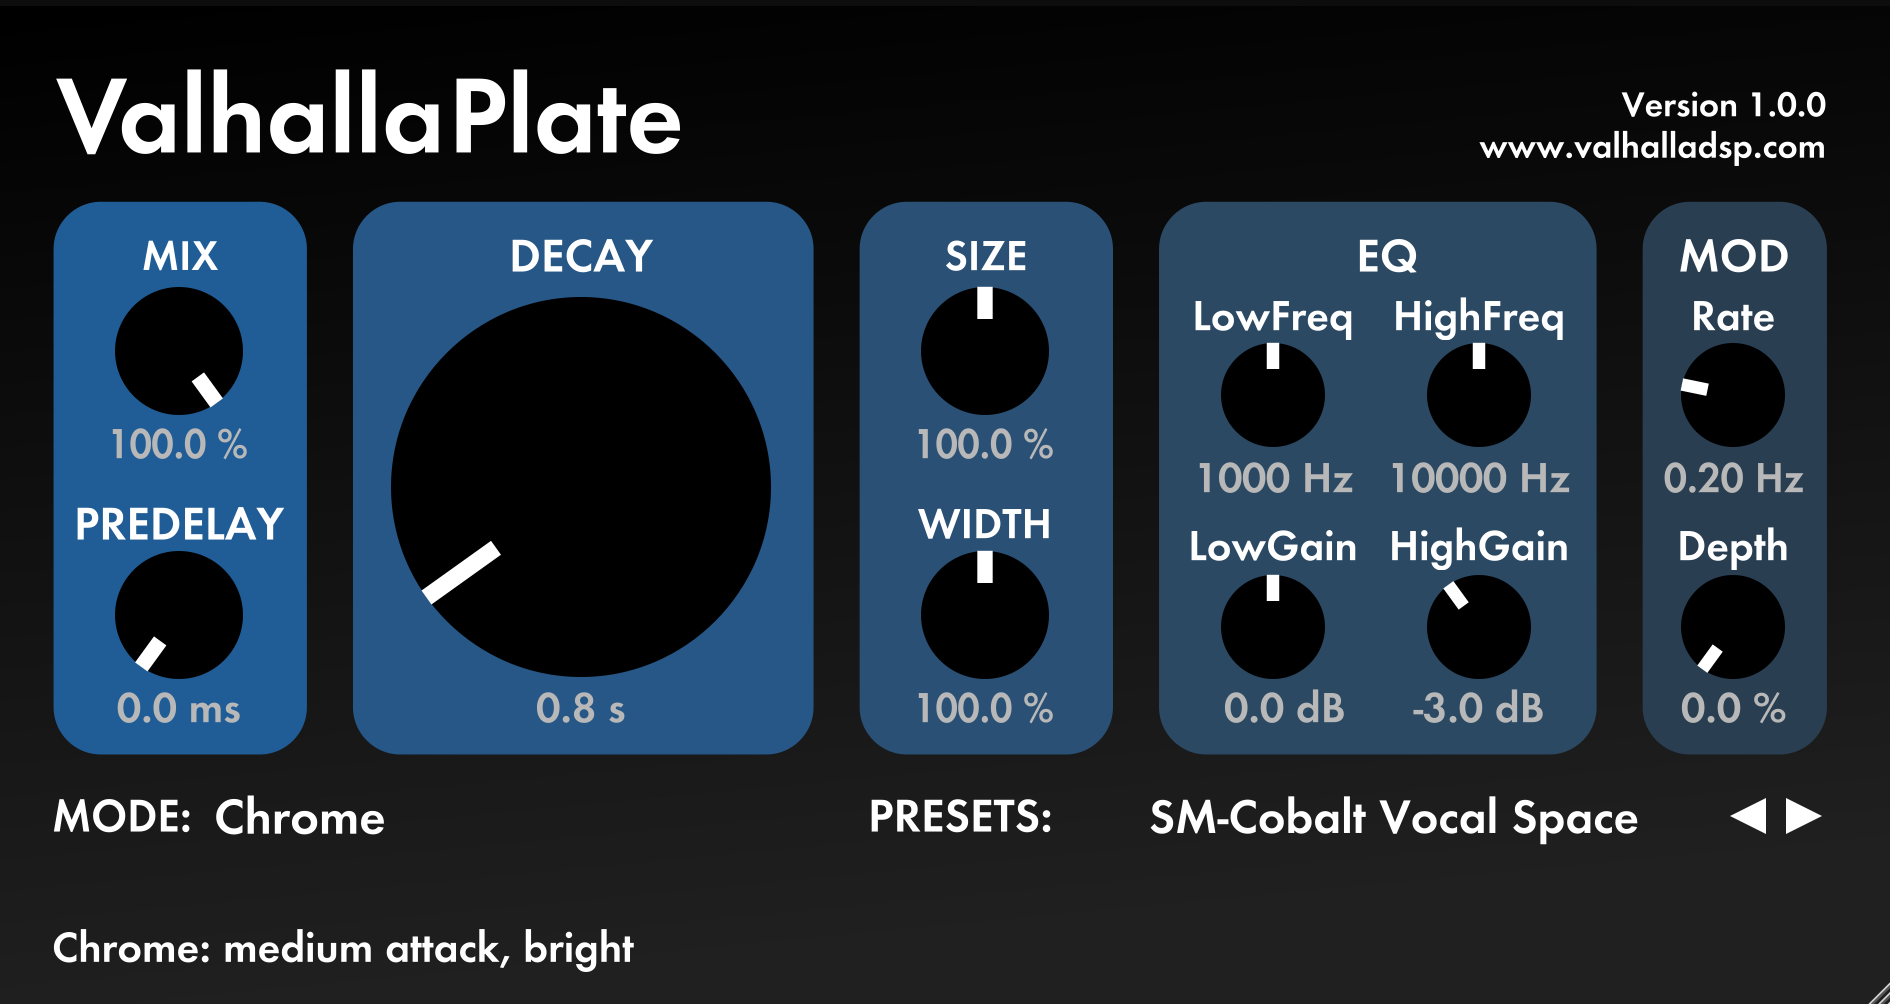
MIX: Yer standard wet/dry mix, with 0% corresponding to a dry signal, 100% corresponding to only reverb, and 50% being an equal mix between the two. The mix control uses the standard sine/cosine crossfade law that all my plugins use.
MIX lock: Click on the word “MIX” above the MIX knob, to lock the MIX at a given value. This is useful when browsing through presets, or when using ValhallaPlate as a send. It was designed to use as a send, by the way. Sends are AWESOME for reverbs.
PREDELAY: A stereo pre-delay, in front of the plate models. The time is specified in milliseconds, and the knob is warped so that there is more control over shorter delays.
DECAY: The ticking heart of the plugin. This controls the midrange decay time, which is defined differently for the different reverb modes. In general, this is an accurate measurement of the RT60 between 2.9 kHz and 3.6 kHz. Below this frequency, the decay time will be either shorter or longer. A quick rule of thumb:
- For DECAY settings <1 second, the low frequency decay will be shorter than the display.
- For DECAY settings between 1 and 2 seconds, the low frequency decay will roughly track the DECAY setting.
- For DECAY settings > 2 seconds, the low frequency decay will be longer than the DECAY setting.
- The specific decay/frequency curve is dependent on the MODE setting.
High frequencies tend to have a fairly short decay setting, regardless of the DECAY setting. Short settings of DECAY will have shorter high frequency decays, but once you get DECAY settings > 3 seconds, the high frequency decay time tends to stay fixed. Again, different modes will have different high frequency decay behavior.
The DECAY knob has been warped so that the majority of the knob travel covers “typical” plate decays, i.e. between 0.5 and 6 seconds or so. The last 25% of the knob travel allows for decay times much longer than a physical plate. This probably isn’t physically accurate, but whatever. It sounds cool.
SIZE: This controls the “size” of the plate, in arbitrary units. More accurately, this controls the modal density of the plate. Smaller sizes (between 0% and 100%) will create a more metallic sound, that is typical of physical plates. Larger sizes (> 100%) allow you to get a much higher modal density than a typical plate, which can create a “smoother” or “clearer” reverb sound.
WIDTH: Adjusts the stereo output width of the reverb. 100% corresponds to a typical reverb plate, where each pickup goes to a separate output channel. 0% mixes the left and right outputs together, and sends them to the left and right output channels. Quite frankly, I think this sounds kinda weird, but WIDTH settings <100% can be useful for creating a smaller stereo image. WIDTH settings >100% increase the perceived width of the image. This isn’t a conventional M/S matrix – the WIDTH control has been optimized for reverb signals.
EQ / Low Freq: Adjusts the cutoff frequency of a 1st order low shelving filter on the output of the reverb.
EQ / Low Gain: Adjusts the boost/cut of the frequencies below the EQ Low Freq setting. This is a gentle boost/cut, and can be used to add some clarity or weight to the reverb.
EQ / High Freq: Adjusts the cutoff frequency of a 1st order high shelving filter on the output of the reverb.
EQ / High Gain: Adjusts the boost/cut of the frequencies above the EQ High Freq setting. This is a gentle boost/cut, and can create some nice warmth when turned below 0 dB, or add a little sheen when turned above 0 dB.
It is worth noting that the equalization of ValhallaPlate will change with the DECAY setting. This is found in real physical plates. The overall equalization is different for each of the reverb modes, with different modes having more or less inherent brightness. Also, the EQ filters are not embedded within the reverb algorithm itself, so the settings of these filters will not affect the decay of the reverb.
MOD Rate: Controls the speed in Hertz of the low frequency modulation of the reverb. This is a chorusing-type modulation, but more subtle than I have used in previous reverb models. The goal of the modulation is to reduce metallic artifacts, without creating pitch changes or obvious chorusing in the output signal. I tend to like to set this between 0.2 Hz and 0.5 Hz, but values up to 2 Hz are useful in making big reverbs for synths.
MOD Depth: Controls the depth of the reverb modulation. For realistic physical plates, this should be set to 0%. Turning this up will take much of the “metal” out of the plate, which can be a good thing for more generic reverb applications.
MODE: This menu displays the active reverb modes, and can be used to select one of seven unique plate emulation algorithms. I will be explaining the various reverb modes in a separate post.
PRESET: This displays the name of the active preset. Click on the name of the active preset to bring up the reverb menu, which allows you to select different presets, save presets, import presets from text format (useful for pasting into forums, emails, blogs, etc.), and export presets.
The arrows to the right of the preset name allow you to scroll through the list of presets.
Such a big fan of valhalla plate! How do you manage to make such light VSTs versus the competition who manage to make such CPU intensive equivalents?
Wish you the best for 2021 and waiting for your next releases for sure!