Minimalism in algorithm design

In our last blog post, I discussed the role of minimalism in the GUI philosophy of Valhalla plugins. The minimalist GUI style has been present since the first Valhalla plugin, ValhallaFreqEcho, was released in the spring of 2010.

The more that we work on plugins, the more I have come to appreciate a deeper minimalism. This minimalism isn’t limited to the GUI style. Instead, it is reflected in the foundational design of the plugin itself. We have long appreciated this quote, commonly attributed to Mark Twain:* “If I had more time, I’d write you a shorter letter.” Honestly, this is one of the guiding principles of Valhalla DSP.

From a technical perspective, we’ve also been inspired by the intellectual rigor Steve Jobs practiced (demanded?) during his reign at Apple. He taught us that a limited number of excellent options increases usability and quality.

The Valhalla plugins are designed to work with a smaller number of parameters. This allows the plugin GUI to be simplified. More importantly, it allows the plugin to be easier to use for creative purposes.

 ValhallaPlate – Minimal Algorithm Design

ValhallaPlate is a good example of minimal algorithm design in action. When designing ValhallaPlate, the goal was to include as many parameters as necessary to get a good plate reverb, but no more.

The plugin ended up having more parameters than a physical plate reverb (which usually has 2 parameters, damping and a low cut filter), but it had what we decided was the right number of parameters to allow for pre-delay, tone control, and modulation. The result was a plugin that has 11 knobs + a mode control, and a reverb that people were able to download and start making music with right away.

ValhallaÜberMod – The Swiss Army knife

Not all algorithms lend themselves to minimalist designs. When we were designing ValhallaÜberMod, I wanted to explore the outer reaches of delay modulation effects (and I was drinking WAY too much coffee so I went kind of mad scientist).

The algorithms in ÜberMod probe intersections of Dimension-D style chorusing, diffusion, and extended multitap delays. The resulting plugin can be viewed as a sonic Swiss Army knife. It can be configured to obtain a huge number of effects: chorus, flanging, standard reverbs, gated reverbs, distorted delays. There are also a bunch of sounds that defy categorization.

However, a Swiss Army knife isn’t always what you are looking for. Sometimes you just need a hammer.

ValhallaSpaceModulator – The Hammer

ValhallaSpaceModulator can be viewed as a different, more minimal approach to delay modulation effects. SpaceModulator only has 5 knobs, as well as a selector to switch between 11 different modulation modes. The resulting sounds explore all sorts of flanging and detuning sound. They can even move into sparse reverb territory. Throughout the entire experience, the algorithms are easy to use.

We’ve removed the complexity from the GUI, and put into the different modulation modes. The results are a plugin that is super simple to use. You get all sorts of cool sounds, ranging from “meat and potatoes” to outer space. ValhallaSpaceModulator is a hammer.

Minimalism Allows Us To Say Yes

As I work on new plugins, I find myself saying “no” just as often as I find myself saying “yes.” New plugins are designed from the ground up to be as simple to use as possible. By saying “no” to extraneous options during the design phase, we are left with choices that are easier for the end user to say “yes.” Which makes it easier to get the mix done, to make your music, to finish your job. Our goal is to fill our plugins full of YES.

Upcoming plugins will only have as many parameters as needed to get the job done. Sometimes this is a simple task (ValhallaSpaceModulator basically wrote itself), and sometimes this is painful and brutal (i.e. the next plugin in the queue). The tricky part is how to create a minimal interface for a plugin, while still allowing for sonic complexity and extended creative possibilities.

* The original quote is from Blaise Pascal, and dates back to 1651: “Je n’ai fait celle-ci plus longue que parce que je n’ai pas eu le loisir de la faire plus courte.” This translates to “I would have written a shorter letter, but I did not have the time.”

Minimalism In Plugin GUIs

Minimalism is one of the driving principles behind Valhalla plugins. In our opinion, a plugin should have exactly what is needed to do the required job. Adding extra stuff in there complicates the situation. Plugins are tools, and an ideal tool is easy to pick up and use right away.

The GUI design philosophy reflects our love of minimalism. Back when we were starting Valhalla DSP, Kristin mocked up a GUI. It used circles for the knobs, short line segments for the knob pointers, and a sans-serif font for the knob labels. The name of the plugin was prominently featured. I looked at the mockup, and said “THAT’S IT!!!” We both fell in love with the simplicity of the idea.

In the past, I’ve written about how I want a plugin to reflect the nature of the medium. A plugin isn’t a 3D object. It isn’t made out of wood, or brushed metal. It doesn’t need screws to hold it together. A plugin GUI is just an idea actualized into pixels of light on a 2D screen. Our goal is to create GUIs that reflect this essential nature.

Minimalism, Winslow Warren, and the Swiss School

One of our big GUI influences was the “Swiss School” of graphic design. Kristin and I love the poster work of Josef Müller-Brockmann, Jan Tschichold, and other minimalist graphic designers . We wanted to design plugins that looked like they could be screen printed, using a few colors. There’s so much noise in the world already. We get overwhelmed by it sometimes, so the idea of keeping things simple with just a few colors and lots of space feels refreshing to us. Ideally, these GUIs give your creativity some room to breathe too.

During the early design period, we envisioned a GUI that looked like a poster. Text areas would appear next to a knob or slider to explain the function of that parameter. We were also inspired by a genius software developer named Winslow Warren that Kristin used to work with. He insisted that all documentation live in the product as functional code. Thinking about this, we changed our approach to a single tooltip area on the bottom of the plugin that changes functionality based on the selected parameter or current settings, so that the documentation made more sense in context and was easier to use.

Photo Credit: https://jasonkeenan.files.wordpress.com/2011/11/muller1.jpg

The name of the plugin is prominently displayed in the Valhalla GUIs so that you know what you’re using. This also stems from our love of Swiss School posters, where there are often 1 or 2 blocks of HUGE text.

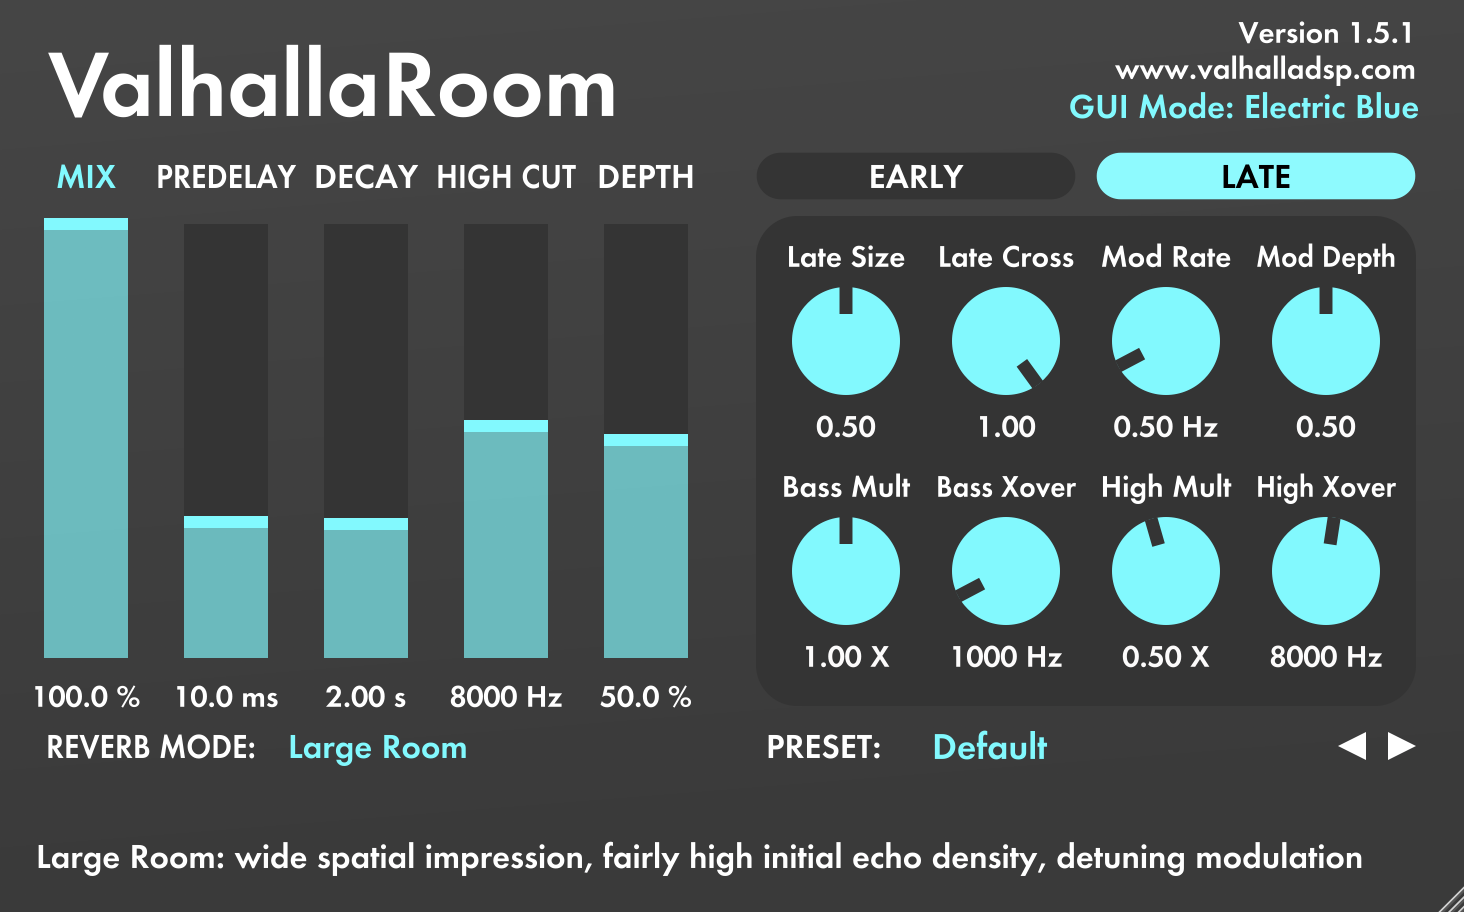
Of course, too much of a good thing isn’t always a good thing. ValhallaRoom’s original design text was gigantic, and used up space that could be put to other purposes. The recently released 1.5.1 revision of ValhallaRoom brought the title text in line with the other Valhalla plugins.

We’ve also learned a lot about the importance of color in accessibility, thanks to helpful feedback from our color-blind customers. The revised Electric Blue color palate for ValhallaRoom should be much easier on everybody’s eyeballs. Enjoy!

Chambers and Plates (and bears, oh my!)

A million and a half years ago (also known as the 1960s), in a little studio in London called EMI Abbey Road, there was a band called The Beatles that recorded some music you might have heard once or twice. The band and their producer, Sir George Martin, were continually intent on pushing themselves further, both from a songwriting standpoint as well as sonically. They used the technology of the day in ways the designers never envisioned. This included their use of reverbs.

Abbey Road’s Plates

Back then there were obviously no plug-ins or even outboard rack units for creating ambience and reverb. The engineers at Abbey Road relied on four EMT 140 plate units in a room above the control room of Studio 3 and also the three chambers that were positioned off Studios 1, 2 and 3.

The EMT plates were the inspiration for ValhallaPlate (Sean and I spent time at Avast! Recording here in Seattle analyzing their beautiful 140 when Plate was being developed). They have a distinctive, rich and vibrant sound. They are a mechanical device with a transducer at one end of a suspended 8′ x 4′ steel plate that is fed from a send on the console. As the sound excites the plate from the transducer, it is picked up at the opposite end of the plate by two pickups (stereo!) and then brought back to a reverb return on the console. While not a wholly “natural” sounding reverb, it has become a well-loved way of processing drums and vocals in particular – they are given a presence and “sheen” that help them pop out in a mix.

Abbey Road’s Chambers

The chambers at Abbey Road (the new Chaotic Chamber algorithm in ValhallaVintageVerb was partially inspired by these with an addendum that I’ll get to in a bit…) were just that; actual rooms painted in thick, glossy paint. The paint encouraged reflections and vertically standing drainage pipes (in Chamber Two) and columns built out from the walls (Chamber Three) provided diffusion. These spaces were driven by a speaker fed from a send on the console and then picked up by a mic, or pair of mics, on the opposite end of the room which were then returned back to the console. This is as real as one can get for utilizing an actual space for a musical reverb!

The Abbey Road engineers inserted a passive filter with two frequencies filtered at the corner frequencies of 500Hz and 10,000Hz when patching a chamber on a send from the console. The steepness of these filters was variable but it meant that all frequencies below 600Hz (think muddy lows that you wouldn’t want getting exaggerated by the reverb) and above 10,000Hz (top-end of cymbals, sibilance in vocals, etc) were getting rolled off BEFORE hitting the chamber, so what was being reverberated were all the important mid-range frequencies that translated so well on radio and the playback devices of the day.

Occasionally, tape delays were also used before the sends to chambers and plates. These added some discrete echoes that would then add thickness to the sound passing through the reverb because there was actually more sound that was started at the send. Chaotic Chamber has modulation based on tape noise/wow and flutter, adding to its emulation of this kind of configuration.

These are well-worn, time-honored techniques that are still relevant today, even as we work with plug-ins on computers. By putting your reverbs on an Aux/effect channel as I spoke about in my previous post, you can place filters and delays in-line before the reverb of your choosing. This allows you to manipulate and shape your effects giving them more character and complexity than just slapping on a reverb and selecting a preset that anyone else can use – although if you do, may I recommend my presets in ValhallaPlate and VintageVerb! 🙂

Bonus Content!

Abbey Road 1 Preset for ValhallaPlate (copy to the clipboard and paste into ValhallaPlate)


<ValhallaPlate pluginVersion="1.5.0dot25" presetName="Abbey Rd 1" Mix="1" PreDelay="0" Decay="0.34000000357627868652" Size="0" Width="0.5" ModRate="0.25990557670593261719" ModDepth="0" LowEQFreq="0.29816749691963195801" LowEQGain="0" HighEQFreq="0.5" HighEQGain="0" Type="0.083333335816860198975"/>


Abbey Road Chamber 2!


<ValhallaVintageVerb pluginVersion="1.7.1" presetName="CC-A Road Chamber2" Mix="1" PreDelay="0" Decay="0.37556874752044677734" Size="0.5" Attack="0.69999998807907104492" BassMult="0.56595015525817871094" BassXover="0.38499999046325683594" HighShelf="0.4583333432674407959" HighFreq="0.28400000929832458496" EarlyDiffusion="1" LateDiffusion="1" ModRate="0.097000002861022949219" ModDepth="0.60399997234344482422" HighCut="0.34000000357627868652" LowCut="0.39597314596176147461" ColorMode="0.3333333432674407959" ReverbMode="0.6666666865348815918"/>

ValhallaVintageVerb 1.7.1 update released. Chaos. Reigns.

I am happy to announce that ValhallaVintageVerb has been updated to version 1.7.1.

The 1.7.1 VintageVerb update is a free update, and is available in the valhalladsp.com user accounts of all people who have purchased a VintageVerb license. Demo versions can be downloaded from the main product page.

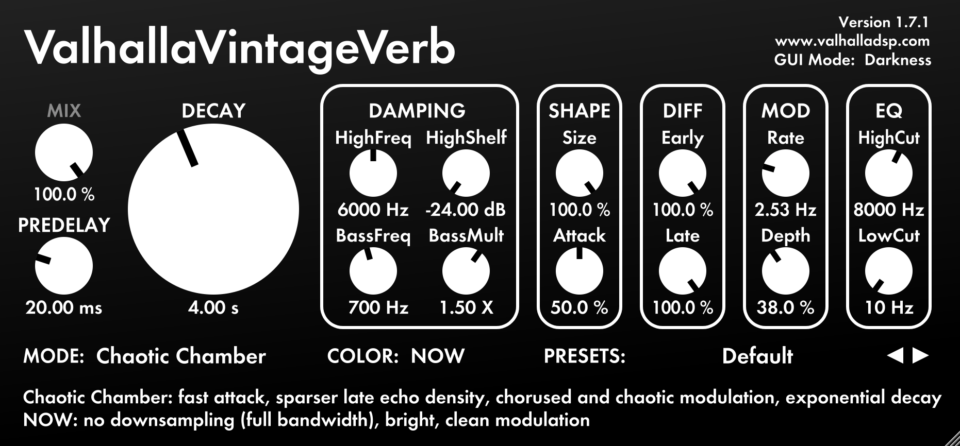
ValhallaVintageVerb 1.7.1 adds 2 new reverb modes, Chaotic Hall and Chaotic Chamber. These modes are the results of a thought experiment: what would “old school” digital reverb algorithms sound like if they were made using tape delays?

The “chaotic” aspects of Chaotic Hall and Chaotic Chamber:

  • The saturation and pre/de-emphasis are based on tape delays, with a higher internal drive level than the other VintageVerb algorithms.
  • The digital quantization noise of the “Dirty” algorithms in VintageVerb has been replaced by tape modulation noise, which results in a more broadband spread of frequencies as the reverb decays.
  • The “random walk” used for chorusing in most of the VintageVerb algorithms has been replaced by a more “chaotic” modulation source. The “chaotic” modulation is closer to the wow/flutter/tape crinkle noise that can be heard in tape echoes, where the wear and tear of the tape loops results in a distinctive pitch modulation.

Chaotic Hall is fairly close to Dirty Hall in its basic structure,  just with “chaotic” elements. Chaotic Chamber is closer to the Smooth algorithms, but with the “digital” artifacts of the Smooth algorithms replaced with “analog” artifacts. Chaotic Chamber also adds some unique signal dependent diffusion parameters, which results in a clearer sounding reverb tale.

When I was adding the chaotic algorithms to VintageVerb, I presumed that the results would be closer to the dark murkiness of tape delays. It turns out that adding chaos to these algorithms resulted in more clarity and transparency in many cases. There are definitely tape-esque artifacts in the decay, but the analog-style saturation reduces ringing in the tail, and the tape chorusing results in less random pitch shifts than the random walk modulation used in the other modes.

The other major change to VintageVerb is a GUI option added to the NOW Color mode. We’ve received a few requests to change the NOW GUI to something darker, to keep it in line with the 70s and 80s modes. Other folks really like bright NOW GUI. The solution was to add a new text field in the upper right corner of the GUI, that is displayed when viewing the NOW mode. Click on the text to select between Brightness (the original white background GUI) or Darkness (the new mode, which is white text against a dark background). Both GUIs retain the “absence of color” that is a critical visual cue for the sonic characteristics of the NOW Color mode.

An earlier blog post goes in depth on self-similarity and chaos in analog audio. The Chaotic algorithms in VintageVerb are the first application of this research, as far as the Valhalla plugins go. Stay tuned for more chaos to come!

ValhallaRoom 1.5.1 Released for OSX and Windows. Electric Blue GUI.

ValhallaRoom 1.5.1 has been released for OSX and Windows.

The main update to ValhallaRoom is the GUI. We’ve updated the Room GUI to fit in with the other Valhalla plugin GUIs.

  • “ValhallaRoom” title is smaller
  • Version info in upper right corner
  • Entire bottom of GUI dedicated to interactive tool tips
  • Knob pointers are larger, easier to see

The new GUI takes up considerably less room than the older GUI, while having the same amount of room for the sliders and knobs.

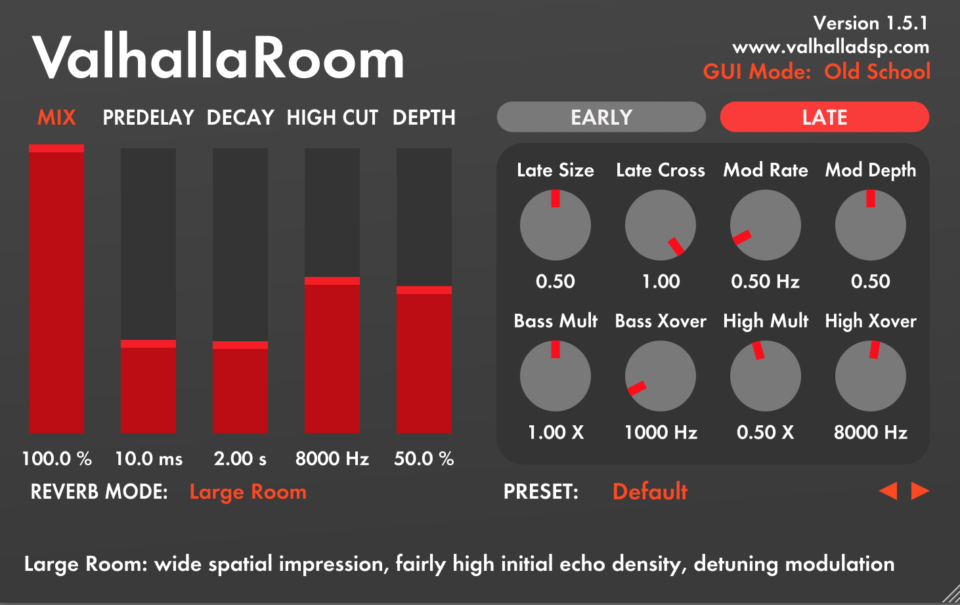
The default color scheme of the ValhallaRoom GUI has been changed as well. The grey & red color scheme of the previous versions wasn’t optimized for folks with color blindness. We’ve changed the GUI colors to the “Electric Blue” color scheme. This was influenced by the LED displays on some older hardware reverbs, and is much easier on the eyes than the previous color scheme.

For those folks that liked the old color scheme, you can switch back to the Old School color scheme by clicking the GUI Mode text in the upper right corner. This allows you to toggle back and forth between Electric Blue and Old School GUI colors, and your preference will be saved for all instances of ValhallaRoom.

We’ve also added tool tips that correspond to the Reverb Mode, so you can see a brief description of the reverb mode at a glance.

The 1.5.1 update is available in the user accounts of all ValhallaRoom license holders. Demo versions are available on the main product page.

ValhallaRoom was first released in March 2011. Since then, we’ve tripled the number of reverb algorithms available in the algorithm, added AAX versions for Pro Tools 10/11/12, and updated the GUI. The 1.5.1 update marks the 12th major update since releasing the plugin. Thanks to everyone who has bought ValhallaRoom in the last 6 years, and thanks for supporting Valhalla DSP!

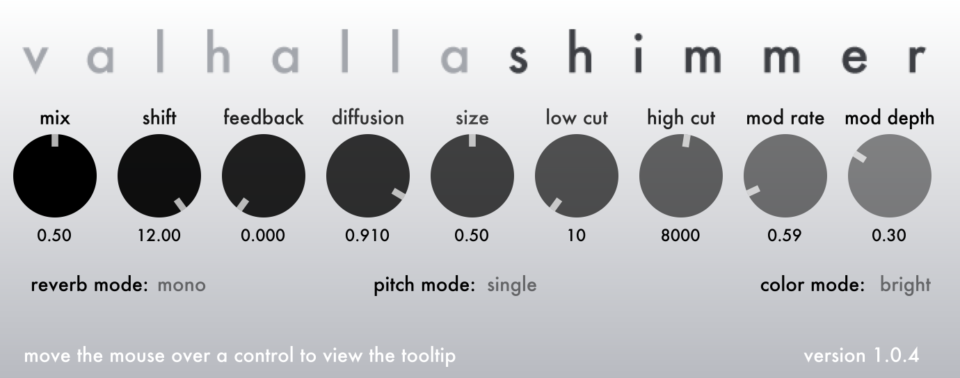
ValhallaShimmer 1.0.4 Beta

The 1.0.4 beta of ValhallaShimmer is available for testing for OSX and Windows.

The changes since version 1.0.3:

  • Added mono-in, mono-out mode. This allows ValhallaShimmer to be used as a mono reverberator, or as a multi-mono reverberator in some DAWs.
  • Updated build settings, to keep pace with changes in OSX and Windows.

The ValhallaShimmer beta is available in the valhalladsp.com user account of all ValhallaShimmer license holders. Thanks for checking this out, and thanks for supporting Valhalla DSP!

Sending my heart…(or my snare to a reverb)

I’m Don Gunn, your Guest Blogger™ for this episode; you may recognize my name from my preset banks in ValhallaVintageVerb and/or ValhallaPlate. I’m a recording engineer/mixer in Seattle and this topic is near and dear to my heart.

Using Sends In An Analog Environment

First, some history!

Back in the “good old days” (AKA less than 20 years ago, before computers became the centerpiece of recording/composing), studios were built around a console/desk and hardware outboard devices for processing and manipulation of audio. Hardware was expensive. Control room real estate was at a premium. If one wanted to use a reverb or delay, you were limited to a number of sends or buses on the console as well as the availability of units in the rack.

When you wanted to put that beautiful Lexicon 224 plate (or even better the EMT140 that occupied half of an iso booth, or if you were truly lucky, a real chamber!) on the snare drum as well as on the vocal and acoustic guitar, you had to rely on using an auxiliary (aux) send from the desk to feed the input of the reverb. This was then brought back to the console on either an aux return or a channel/pair of channels on the desk.

The aux sends on the channels acted as a valve (physical valve controlling the flow of signal, not vacuum tube or “valve” in the parlance of our friends in the UK) governing the amount of that channel’s sound that was fed to the reverb. This meant that even though multiple channels were using the same reverb unit, the snare could be sending a different amount compared to the vocal compared to the guitar; this was all part of mixing and lent a unifying sound to the music because disparate elements could share a common reverberant space.

Turning Your Laptop Into A Molten Pile Of Plastic

Fast forward to today. Anyone with a laptop has more processing options than a city block’s worth of studios could have in the ‘70s or ‘80s. Coupled with a lack of understanding about signal flow and processing efficiency by many people that have never stepped foot in a commercial recording studio (not a criticism, merely an observation based on hundreds of projects sent to me for mixing…), reverbs (or delays, or phasers, or…) are now appearing on EVERY SINGLE CHANNEL STRIP of many DAW projects even if they are exact duplicates of the reverb on adjacent channels.

Some of the blame for this can be squarely aimed at the preset culture of many current DAWs where it’s only a menu click away to select the “perfect” collection of plug-ins on a channel strip for “Deep Male Pop Vocal” or “Kick Drum of the Gods”. What happens in this instance is you now have ten or 20 or 100 or 200+ tracks, all with different reverbs, that bear no relation to one another or the space you want your musical world to inhabit. You’re also watching your computer start to turn into a molten pile of metal and plastic as it tries to keep up with the processing power demanded by all these simultaneous effects.

Even worse is when most or all of the reverb settings are the same because a channel has been copied to accommodate a new vocal track, so now there are 17 vocal tracks, each with an exact copy of the same reverb plugin placed on it.

Cleaning Up Modern Technology’s Mess

So, how do we clean up this mess that modern technology has created for us? By looking to the past!

I’m not a Luddite or revisionist by any means, but I think there are many things about “the old ways” that make a lot of sense and ultimately can provide for a more musical end result when applied to the DAW workflow. Rather than sticking a reverb (or “insert your effect of choice here…”) on every track of your projects, learn about your DAW’s abilities to utilize sends/buses/auxes/effects tracks or whatever new name the designers have come up with to describe the method of “sending a signal from one place to another.”

By learning your DAW’s abilities, those 17 vocal tracks I talked about above can now all have an individual send control that is routed to a single instance of a reverb (which is set to 100% wet). You have complete control over how much or how little of each track you are sending to that reverb. You also now have the ability to apply other effects (EQ, compression, distortion) before or after the reverb on the auxiliary channel to further shape the sound. Most DAWs will also let you apply sends to Aux tracks, so with this method you can now send your reverb return to another effect or automate it on a particular word or musical phrase. By using sends, you can better utilize the power and flexibility of your DAW to craft more dynamic and interesting mixes and arrangements.

What Environment Will Your Music Inhabit?

Something else to consider is the “environment” you wish a piece of music to inhabit. Are you writing/mixing a quiet ballad with barely whispered vocals or an EDM banger with screamo, throat-tearing singing, or perhaps a string quartet? Each of these (or any piece of music for that matter) can live in a myriad of “spaces”, from a concert hall to a closet to a stadium and every space in between.

By figuring out what kind of world in which you want your music to live, you can set up a couple of reverbs on sends (lets say a short chamber for the “close” reverb and a long hall for the “large and distant” one). By sending each track at appropriate amounts to each one, you’ll help determine how close or distant each element of the mix appears to the listener. There’s also no rule that says every track MUST be sent to a reverb or other effect. Keeping some elements dry or almost dry can really help make them feel forward and more “important” rather than relegated to the back of the soundstage.

If this style of working isn’t something you’re currently employing, dear reader, I encourage you to try it and experiment. I think you’ll find you can make more “glued together” mixes that feel like they are part of a sonic world you create.

Also, remember that these aren’t hard and fast rules, but merely suggestions for a more flexible and efficient workflow; there may be times were you DO want a specific, singular reverb or effect on a track, and if so, by all means insert it and use it to the fullest extent possible. The beauty of music and mixing is that you can take all the rules and toss them out the window if they aren’t working for you, but I hope this gives you some things to think about and try!

Chaos in Audio: Self-Similarity

Back in the early 90s, the term “chaos theory” was often bandied about as THE FUTURE. It was never clear exactly what chaos theory would be THE FUTURE of, but it was clearly important stuff. Fast forward 20 years, and I’m finding all sorts of areas where chaos theory is relevant to musical audio.

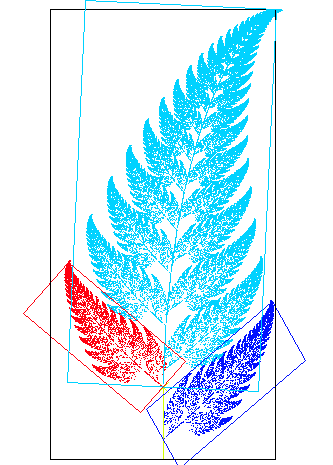
One of the big concepts in chaos theory is self-similarity. This term is used to describe objects or processes that appear to be similar at different time scales. Self similarity can be found in the cragginess of a coastline, where zooming in at ever smaller resolutions results in similar craggy patterns. A classic visual representation of self-similarity from the early days of chaos theory was a simulated fern, where each leaf was the same pattern as the entire fern:

This fern is a classic example of self-similarity

Feedback through a pitch shifter can be viewed as a DSP process that creates self-similarity. Each time the signal passes through the pitch shifter, a copy of the original signal is created, but at a different “size” (i.e. pitch) and different scale (i.e. the volume). If the pitch shifter used has a long enough window for its grains, each grain can end up containing copies of the original temporal detail of the input signal, scaled in both time and amplitude. Shifting a signal up by an octave, and feeding this back into the input of the shifter, will result in a signal that is self-similar at different frequency/wavelength scales.

For many natural processes, the details end up getting blurred at the smallest resolutions, due to the nature of the physical materials at these resolutions. This blurring is reminiscent of the “blurred self similarity” generated by the classic shimmer effect, where the signal is self-similar at different frequency scales, but the temporal details are lost.

Many natural processes can be viewed as self-similar random processes, where the scale of the randomness follows a 1/fn distribution. In other words, there is randomness happening at all frequencies/time scales, but the amplitude of that randomness falls off as a factor of frequency.

Self-similar randomness can be heard in glorious detail inside of a tape echo.

tapeechostack

A highly damaged tape loop creates randomized pitch modulation at different time scales, that is far more complex than your typical sine LFO, or the “randi” modulator found in the Music N computer music languages. Mix this pitch modulation in with the dry input signal, and the result is a natural doubling sound. Turn up the echo time and feedback, and the result is a huge ambient sound, where the complex pitch variation produces a rich, organic wash.


Z-DSP Shimmer Cartridge

I am happy to announce that the Z-DSP Shimmer cartridge has been released.

The Z-DSP Shimmer cartridge has 8 original algorithms, designed to combine lush reverberation with multiple voices of pitch shifting, to create ethereal pads, rich chordal textures, dissonant clouds of sound, and a variety of other sounds that are perfect for electronic music. The algorithms are customized to work with the Tiptop Audio Z-DSP Eurorack module.

There are 6 reverb algorithms in the Z-DSP Shimmer cart, arranged in order of complexity:

  • Fast Shimmer: A modulated reverb that quickly decays away into an endlessly pitch shifting tail. The shift interval can be set between +/- 12 semitones. Perfect for that classic “octave up” shimmer sound.
  • Slow Shimmer: Similar to Fast Shimmer, but with a much slower attack.
  • Dual Shimmer: Two pitch shifted voices, embedded within a larger modulated reverb network, shifting the reverb decay in both positive and negative directions. Try slowly sweeping the Shift control in this mode for ridiculously cinematic sounds.
  • Triple Shimmer: Two pitch shifted voices embedded within the reverb decay network, plus a third voice external to the network. This allows the user to have a reverb with +12 and -12 semitones of feedback, plus a stable +7 semitones voice without feedback.
  • Quad Shimmer: Four pitch shifted voices feeding into a lush modulated reverb. This allows for a variety of dissonant and consonant chordal textures, with the max Shift setting corresponding to a rich major chord.
  • ClusterVerb: Four pitch shifted voices embedded within the feedback network of a modulated reverb. The result quickly becomes dissonant or metallic. Perfect for insta-Ligeti, or Penderecki In A Box™.

In addition, the Z-DSP Shimmer cart features 2 special effects algorithms:

  • Quad Detune: 4 short pitch shifted delays, feeding back on each other. A variety of chorus, detuned, and dissonant effects can be obtained through this mode. Turn up the Feedback for maximum fun.
  • PitchEcho: A single pitch shifting voice, combined with a tape echo emulation = sound mangling joy. Turn up the feedback for barberpole self oscillation, and sweep the decay time for all sorts of swoopy glitches.

The Z-DSP Shimmer cart retails for $75, and will be available at your favorite Eurorack store in the next few days.

ValhallaPlate: On Diffusion

One of the goals for ValhallaPlate was to have a minimal user interface. The goal was to have as many controls as necessary to sculpt beautiful plate reverberation, but no more. Any parameters that were deemed superfluous, or were even on the edge of being so, were removed from the interface.

The Diffusion control has become a standard feature of most reverb plugins.  But ValhallaPlate is the first Valhalla reverb to not have a diffusion control.  Why?  Read on!

Why is Diffusion important in music?

Diffusion is used in reverbs to adjust the initial echo density of the reverb.  The Diffusion control is present in most algorithmic reverbs as a way of dealing with artifacts. A diffusion value that sounds good on vocals may not sound good on drums, and vice versa. By dialing in a given Diffusion value, the user can figure out the right compromise for the input signal. The Size control is often used in conjunction with the Diffusion control, to balance out grain vs. metallic coloration.

How do you make a Diffusion plugin?

In an earlier blog post, I discuss how the Diffusion control commonly works in algorithmic reverbs. The most common technique is to use several short cascaded allpass delays to build up the initial echo density of the reverb, where the Diffusion control adjusts the allpass coefficients of these delays. These cascaded delays give rise to various sonic artifacts, depending on the number of delays, their lengths, and the allpass coefficient settings:

  1. If there are only a few allpass delays, the initial onset of the reverberation will be sparse, but with a natural attack/decay.
  2. Using a larger number of allpass delays will result in a slower attack time for the reverb, that can sound unnatural.
  3. A higher valued allpass coefficient (i.e. somewhere between 0.7 and 0.99) will result in a faster attack and a higher echo density, but will also create a metallic sound.

Why did you leave Diffusion out of Valhalla Plate?

ValhallaPlate doesn’t have a diffusion control, because it doesn’t need one. During the development process, I figured out a new diffusion technique, that resulted in a sharp attack with no grain, while avoiding the metallic sound commonly found with cascaded allpass diffusors. The result is a reverb that works on pretty much any input signal, without any adjustments necessary. The simplicity of the GUI stems from solving issues at the algorithmic level.

The improved diffusion technique used in ValhallaPlate is reflected in the presets available for the plugin. The presets are arranged by decay times: Huge, Large, Medium and Small. There are no specific preset categories for drums, or vocals, because the same ValhallaPlate settings work equally well on both. The presets names in many reverbs are a reflection of “this sounds good on this source,” but this is also a way of saying “yeah, you probably want to use it on this source, as opposed to something else.” ValhallaPlate doesn’t need to be handled that gingerly. Put ValhallaPlate on whatever source you want, and adjust the SIZE and EQ controls to get the sound you want.

I view ValhallaPlate as being closely related to an SM57. Or a hammer. No need to be delicate with the tool. No need to think about things too much. It just works.