ValhallaDelay: The Controls

ValhallaDelay was designed from the ground up to capture the sound of different types of delay units (tape, BBD, early digital), while both expanding upon these sounds, as well as keeping things as simple as possible. The ValhallaDelay controls strike a balance between minimalism and comprehensive, to allow the user to get the sounds they want as quickly as possible.

The visible controls in ValhallaDelay depend on both the active Mode and Style. Only the controls relevant to a given Mode/Style combination will be visible in the GUI, with the values in the inactive Modes/Styles being retained so you can easily switch back and forth while previewing sounds.

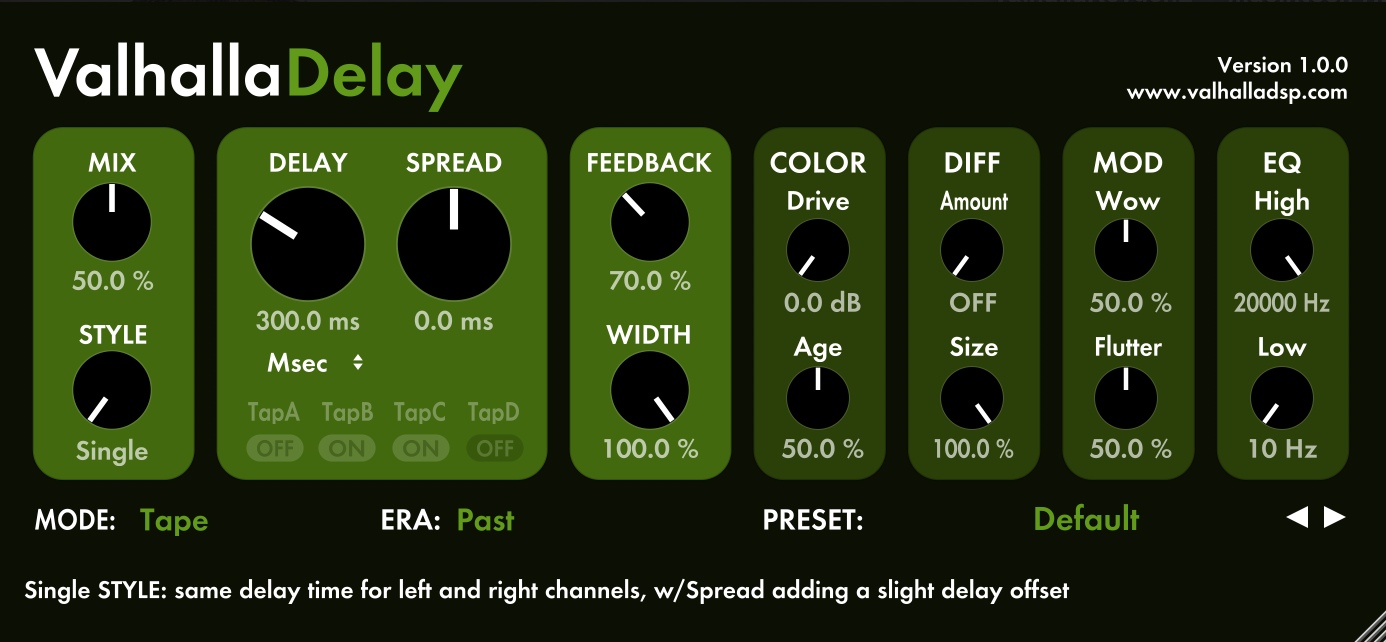
A quick overview of the controls, going from left to right in the GUI:
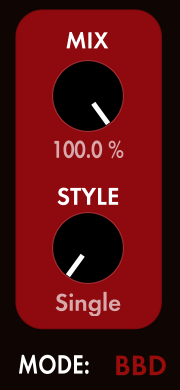
Digital Delay Audio Plugin for DAW | Mix ControlsMIX: Wet/dry mix, with 0% corresponding to a dry signal, 100% corresponding to only the delayed signal, and 50% being an equal mix between the two.

MIX lock: Click on the word “MIX” above the MIX knob, to lock the MIX at a given value when browsing through presets.

STYLE: Selects the relationship between the left and right delay channels, and the number of delay voices in each channel. See the blog post on ValhallaDelay styles for more details.

MODE: A high level control that selects the base algorithm (Tape, BBD, Pitch, etc.) being used by ValhallaDelay. See the blog post on ValhallaDelay modes for more details.


Analog Delay Emulator | Valhalla Delay Time Control

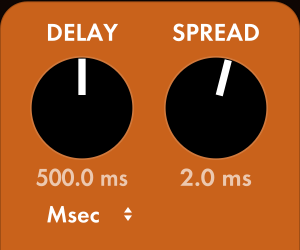
DELAY (Single Mode): Sets the base delay for both left and right channels.

SPREAD (Single Mode): Sets a delay offset between the left and right channels. The value in milliseconds is added to the left channel, and subtracted from the right channel. Spread is useful in creating a wider stereo image.


Ping Pong Delay Digital Effect Plugin | Valhalla

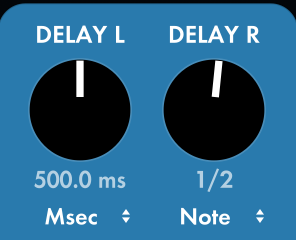
DELAY L (Dual & Ping Pong Modes): Sets the base delay for the left channel, in the Dual and Ping Pong modes.

DELAY R (Dual & Ping Pong Modes): Sets the base delay for the right channel, in the Dual and Ping Pong modes.

DELAY L Sync and DELAY R Sync: These combo boxes allow you to choose whether the delay is set in milliseconds, or as a factor of the project’s tempo. You can select milliseconds, notes, dotted or triplets.


Digital delay Plugin Ratio Settings | Valhalla

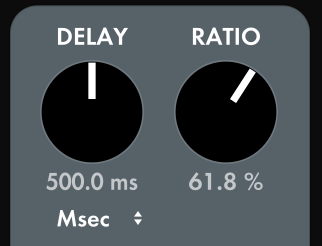
DELAY (Ratio Mode): Sets the base delay for the left channel

RATIO (Ratio Mode): The right channel’s delay length is the ratio setting times the left delay length. A Ratio setting of 100% results in equal delay lengths between left and right channels. Setting Ratio to 61.8% results in a “Golden Ratio” pseudo-reverb, where the echo density builds over time in a really cool way.
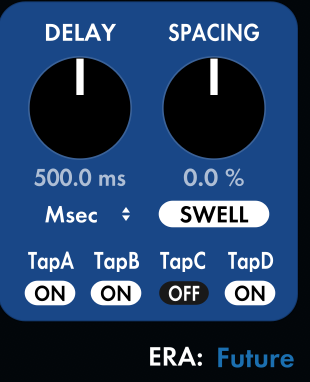


Valhalla Delay Quad mode Digital PluginREPEAT/SWELL (Quad Mode): Controls whether the feedback comes from TapD (REPEAT), or from a sum of all the active taps (SWELL).

  • REPEAT is useful for getting repeating tap patterns in the echo response.
  • SWELL is useful for creating the resonant multi-head sounds of older tape echoes, or pseudo-reverb sounds when SPACING is turned up.

Tap A/B/C/D (Quad Mode): Enable or disable the taps associated with their position (TapA is first, TapD is last).

ERA: Selects different variations of the active Mode. This controls values that are hardwired in the algorithms, such as higher order filters, saturation smoothing, diffusion behavior, and so on. See the blog on the ValhallaDelay Modes for more details.


Digital Delay Plugin Feedback and Width

FEEDBACK: Controls the amount of the delay that is fed back into the input to create multiple repeating echoes.  Self-oscillation usually begins around 100%, depending on other settings of the plugin. The FEEDBACK control goes up to 200%, to allow for howling self-oscillation.

WIDTH: Controls the panning of the left and right delay outputs.

  • A setting of 100% maps left inputs to left outputs, and right inputs to right outputs.
  • 0% mixes the left and right delay outputs together equally, which can result in strong flanging sounds in some modes.
  • -100% swaps the left and right output channels.



Delay Plugin Saturation EffectCOLOR Drive: Controls the input boost to the saturation algorithm used in a given Mode. The amount of boost is given in decibels. The output of the algorithm is scaled by (-boostInDb/2), which results in a constant volume for all levels of Drive.

COLOR Age: Controls the amount of “age” artifacts added to the algorithm. This is different depending on the Mode:

  • Tape: Age adds asperity noise and tape splice artifacts
  • HiFi: Age adds asperity noise
  • BBD: Age adds bucket brigade chip noise, that tracks the signal dynamics due to the compander
  • Digital: Age controls the bit depth of the floating point converter
  • Ghost: Age adds asperity noise
  • Pitch: Age controls the bit depth of the floating point converter
  • RevPitch: Age controls the bit depth of the floating point converter


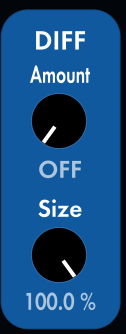
Digital Delay Diffusion Control | Valhalla DSPDIFF Amount: Controls the amount of diffusion being used:

  • At the lowest setting, the diffusion network is turned OFF. This saves CPU when diffusion is not in use.
  • A setting of 68% will produce a diffusion setting that fades in and fades out with equal time constants.
  • A setting of 91% is useful for getting reverb from the diffusion network on its own, without any Feedback.

DIFF Size: Used to adjust the overall span of the diffusion network’s size, relative to the overall delay length.

  • Small values of DIFF Size will blur the attack of percussive signals, while still sounding like a delay.
  • Large values of DIFF Size will transform the delay into a more reverberant sound.
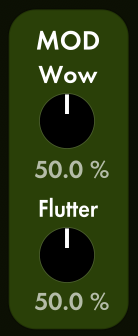
 

Digital Delay Tape Mode DegradationMOD Wow (Tape Mode only): Controls the depth of the slower random length modulations of the delay signal (the rate of the modulation is a factor of the delay time).
MOD Flutter (Tape Mode only): Controls the depth of the faster random length modulations of the delay signal (the rate of the modulation is a factor of the delay time).


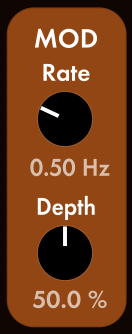
Digital Delay Modulation ControlMOD Rate (HiFi/BBD/Digital Modes): Controls the rate of the random delay length modulation in the HiFi Mode, and the periodic delay length modulation in the BBD and Digital modes.
MOD Depth (HiFi/BBD/Digital Modes): Controls the depth of the random delay length modulation in the HiFi Mode, and the periodic delay length modulation in the BBD and Digital modes.


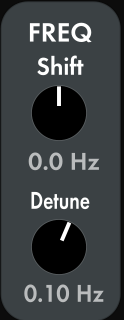
Digital Delay Frequency Shifting Control PluginFREQ Shift (Ghost Mode): Controls the frequency shifting of both the left and right channels in the Ghost Mode, in Hertz.

FREQ Detune (Ghost Mode): Controls the amount of frequency shift offset between the left and right channels in the Ghost Mode, in Hertz. Low values result in a subtle stereo spread, while higher values create a more rapid panning effect.
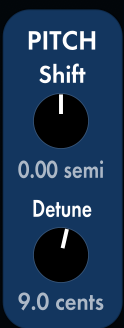


Pitch Shifting controls for Digital Delay PluginPITCH Shift (Pitch/RevPitch Modes): Controls the pitch shift of both the left and right channels, in semitones.

PITCH Detune (Pitch/RevPitch Modes): Adds a small offset to the pitch shift between the left and right channels in cents. Perfect for microshift and doubling applications.


Digital Delay Plugin EQEQ High: Controls the cutoff frequency of a high cut filter, in Hertz. The filter is in the feedback path of the delays.

EQ Low: Controls the cutoff frequency of a low cut filter, in Hertz. The filter is in the feedback path of the delays.


Introducing ValhallaDelay

After 3 years of work, it’s finally here: ValhallaDelay.

ValhallaDelay GUI

ValhallaDelay is a comprehensive delay plugin, for AU/VST/AAX on OSX and Windows. ValhallaDelay has been designed from the ground up to emulate classic tape, BBD, digital and pitch delays, while expanding their sonic capabilities.

ValhallaDelay has seven unique delay Modes (Tape, HiFi, BBD, Digital, Ghost, Pitch, RevPitch) and five delay Styles (Single, Dual, Ratio, PingPong, Quad). By combining the Modes and Styles, you can get classic multi-head tape echoes, dark bucket brigade delays, old-school digital delays, pitch doublers, reverse delays, screaming feedback, subtle choruses…the list can go on and on.

We spent a ton of time modeling vintage hardware delays, but we didn’t stop there.

  • ValhallaDelay adds a comprehensive Diffusion section, so any delay Mode can be transformed into a smeared delay, or a massive reverb.
  • The Age and Era controls are used to dial in the right amount of mojo, so you can have bright, sparkly delays or crusty old noisy echoes.
  • The Drive control is a quick way of dialing in subtle warmth, crunchy repeats, or screeching feedback echoes.
  • The delay range has been extended from <1 msec all the way to 20 seconds, so ValhallaDelay can get short flanging sounds all the way to massive looping delays.

A lot of thought went into the ValhallaDelay controls. The GUI has all the controls you need for a versatile delay, while leaving out unneeded controls, so that the interface is quick and easy to use. All controls are on a single screen – no hidden tabs or menus. The goal is to create a tool that you can learn quickly, so that you can get the sounds you want and get your work done!

We have lived and breathed delay algorithms for a long time now, and we are excited to finally release ValhallaDelay into the wild. Thanks for checking it out!


ValhallaDelay: The STYLE Control

The STYLE control is one of the most powerful features of ValhallaDelay. It controls the relationship between the left and right delay channels, and the number of delay voices in each channel. The STYLE control also affects the visibility of other controls in the ValhallaDelay GUI, so that only the relevant controls are exposed for any given style.

You can find the STYLE control in the lower left portion of the GUI:

There are five separate styles in ValhallaDelay:


Single: The same delay time is used for the left and right delays, and the left and right channels use the same modulation waveform.

  • This is essentially a “mono” delay, except that it processes left and right channels separately, in order to preserve the stereo image of your input signal.
  • The SPREAD control allows for a slight offset between the left and right delays, which can create a wide, 3D sound from mono inputs.


Dual: Separate delay controls for left and right channels, called DELAY L and DELAY R.

  • Each channel feeds back on itself, so there is no cross feedback.
  • The modulation waveform is different between the left and right channels. The Dual Style is essentially 2 delays in parallel.


Ratio: The DELAY knob controls the delay time of the left channel, while the right channel’s delay time is set as a ratio of the left delay time, using the RATIO control.

  • The feedback paths of the left and right channels are combined via a unitary matrix. If RATIO is set to any value less than 100%, this results in a gradual build of echo density with higher feedback values.
  • Setting RATIO to 61.8%, and turning up the feedback, results in a cool pseudo-reverb sound.


PingPong: The left and right inputs are summed, then sent into the left delay.

  • The feedback of this goes into the right delay.
    • The right delay’s feedback goes into the left delay.
      • The left delay’s feedback goes into the right delay again.
        • And so on. This produces the classic ping-pong delay sound
  • You can set DELAY L and DELAY R to different values, for different ping-pong rhythms.
  • If you want to have the “ping” come out of the right channel at first, just set the WIDTH control to -100%


Quad: Used to emulate the “multi-head” tape echoes of yore.

  • TAP A/B/C/D are used to switch on/off individual tape heads
  • The TAP buttons control pairs of delay reads – one for the left channel, one for the right.
  • The SPACING control allows you to adjust the spacing between TAP A/B/C/D, as well as the spacing between left and right channels.
    • SPACING of 0% results in identical spacing between the taps.
      • So, with a DELAY setting of 500 msec, TAP A = 125 msec, TAP B = 250 msec, TAP C= 375 msec, TAP D = 500 msec
    • SPACING less than 0 % results in taps that get closer to the longest delay
    • SPACING greater than 0% results in taps that get closer to the shortest delay
  • The REPEAT/SWELL button changes the feedback behavior of the Quad mode
    • REPEAT takes its feedback from TAP D, which will always be set at the DELAY setting (i.e. the longest delay) for both left and right channels.
      • REPEAT is the preferred mode for delays with repeating tap patterns
    • SWELL takes its feedback from all of the taps that are switched on. This results in sounds similar to the multi-head modes in the RE-201 and RE-301.
      • The SWELL mode can get unstable with feedback. Increasing the modulation rate/depth (or the detuning in the Pitch/RevPitch/Ghost modes) allows for higher feedback levels before things start to howl like banshees.
      • Using SWELL with SPACING > 0, and a lot of modulation, can get some cool sounds that are reminiscent of the old Space Station reverbs.

Reverb 101: Size

One of the most commonly found parameters in digital reverbs is Size. This parameter is sometimes a percentage, but in other cases it is given in meters or cubic meters. But what does Size mean in a digital reverb?

How does Size work?

In most digital reverbs, Size is used as a scalar for some/all of the delay lengths that make up the digital reverb network. A smaller Size value will reduce the length of the delays in the reverb algorithm, while larger Size values increase the length of the delays.

What are the sonic effects of the Size setting?

When the Size parameter is increased in a digital reverb, you will often hear the following effects:

  • A slower attack to the reverb. The diffusion and early reflection networks in a reverb are often tied to Size. If they are, increasing the Size will cause the diffusion to build up more slowly, and increase the spacing between the delays in the early reflections. This causes the reverb to fade in more slowly, and helps to separate the reverb from the source material.
  • Less metallic decays. Larger Size settings will increase the length of the delays in the reverb tail, which increases the resonance (eigenmode) density. A higher resonance density is what you find in larger rooms and halls.
  • More discrete echoes in the initial part of the decay. This can sound grainy when processing sources with strong transients, such as percussion or vocal sibilants.
  • If modulation is used in the reverb, it may sound less obvious, or less chorused, when the Size parameter is increased.

Decreasing the Size parameter has the opposite effects:

  • A faster, tighter attack to the reverb. The input signal sounds closer to the listener.
  • A more metallic sound, in many cases. Think about the difference between a concert hall and a bathroom. Both have fairly long reverb decays, but the bathroom is far more resonant sounding.
  • Fewer discrete echoes in the reverb onset, for a smoother sound with percussion.
  • Stronger modulation artifacts.

Does the Size parameter have any relationship to the physical world?

Kinda. In some cases, when the size is listed in meters, the Size parameter can be viewed as representing the longest dimension in a rectangular room. So, if the Size is at 30 meters, the virtual “room” would be a rectangle with 30 meters from front to back.

In reality, a room with a front-to-back dimension of 30 meters will almost always sound far richer than an algorithmic reverb with a Size of 30 meters. This has to do with the resonance density of the room, which is a pretty esoteric topic that I will tackle in a future blog post. Suffice it to say that higher resonance densities sound smoother, and digital algorithmic reverbs are hard pressed to achieve the resonance density of a fairly small room, to say nothing of a concert hall.

The same can be said for Size measurements in cubic meters. In at least one notable hardware “room simulator,” the Size settings go up by orders of magnitude: 10 m3, 100 m3, 1000 m3, all the way up to an impressive 1,000,000 m3. In reality, each increase in the Size parameter results in a doubling of the internal delay lengths. This will result in higher modal densities, but to nowhere near the extent that the Size in cubic meters would suggest.

Any recommended tricks for setting the Size setting?

The answer for this sort of question will always be “set it by ear, to your own tastes, so that it fits the music you are working on.” However, I can offer a few hints:

  • For a richer reverb sound, set the Size as big as you can get away with, until either the attack is too slow or you start hearing objectionable grain. Once your reach this point, turn the Size down to a slightly lower value, until the grain goes away.
  • For sounds that have slow attacks without prominent transients (such as pads, orchestral, some vocals), feel free to crank the Size way up.
  • Percussion usually needs a somewhat smaller Size in order to not sound chattery.
  • If you have a really short reverb decay time, you might want to turn the Size down, so that you have maximum echo density during the audible part of the decay.
  • Very small Size settings are useful for special effects, and very metallic “oil tank” sounds, but aren’t normally that pleasant to hear.
  • For a more chorused decay, turn the Size down a bit.
  • Increasing the modulation rate/depth in reverbs with smaller Size settings will reduce some of the metallic coloration. This is why the EMT250 has such pronounced chorusing – the modulation was used to cover up the small amount of delay memory used in the algorithm, which essentially corresponds to a small Size setting.

Questions? Have some favorite reverb Size tricks you want to share? Leave a comment below!

Effect-O-Pedia: Delay

Delay is one of the most widely used effects in music and audio today. Simply stated, a delay is one or more repeats of a sound, where the repeat happens some time after the original sound.

Delays are ubiquitous in nature, but are not usually heard as such. The classic example of an echo is shouted at a distant canyon wall, and hearing the sound repeated back to you. However, delays occur wherever there is a surface that is reflective enough to bounce a sound back to the listener, which describes pretty much everything except absorbent surfaces such as foam rubber and snow. For the most part, echoes are either heard as coloration to the original sound (comb filters), or as reverberation, which consists of many short delays that blend into each other so that they aren’t heard as discrete echoes.

The earliest use of delay in recordings was realized using reel-to-reel tape recorders. In a tape recorder, the playback head is located a few inches away from the record head. If the playback head is used to monitor the recording in real time, the input signal to the tape deck will be delayed by a factor that depends on the tape speed, as well as the distance between the record and playback head.  This technique can be heard on Les Paul’s guitar and Mary Ford’s vocals in their 1951 recording of “How High The Moon”:

https://www.youtube.com/watch?v=ihIR81n9I0Y

Starting in the late 1950s, dedicated tape echoes such as the Echoplex were used to create delay effects. These tape echoes used a loop of tape, that was continually being recorded onto (and later erased). The tape loops would quickly become worn and stretched, producing all sorts of distortion and warbling pitch artifacts. At the time, these artifacts were considered a drawback, but today tape echoes are sought out precisely for their warm, slightly pitch modulated sound, as well as for the unique oscillating sound produced when the feedback is turned up.

In the early 1970s, bucket brigade delays (BBD) were developed. These used a specialized integrated circuit that samples the input voltage, and moves the voltage along a series of capacitors, with the voltage being transferred once per clock cycle. Bucket brigade delays are known for their warm sound, which is mainly due to the filtering and noise reduction techniques used to bring the fidelity up to passable standards.

BBD pedals such as the Electro-Harmonix Memory Man added LFOs to the basic circuit. By modulating the delay time via an LFO, the pitch of the output could be slightly varied in time, producing a vibrato sound. BBD chips were also used in chorus and flanger pedals such as the Boss CE-1 and Electro-Harmonix Electric Mistress, usually using BBD chips that had much shorter delay times.

The 1970s also saw the introduction of digital delays. A digital delay samples the input signal, and stores the results in digital memory. In theory, this can produce a delay that is an exact duplicate of the original signal, just shifted in time. In practice, the limitations of early digital circuitry (such as fairly low sampling rates and bit resolutions) meant that early digital delays had to use some of the same filtering and noise reduction tricks as BBD delays. Older digital delays often had a fairly warm and gritty sound; it wasn’t until the later 80s that advances in digital technology brought the fidelity up to the level that was promised by the theory.

Today, digital delays are ubiquitous, both in hardware and in software form. Many of the current digital delay offerings embrace the high fidelity that is inherent to modern technology. Other digital delays emulate the tape and BBD delays of the 60s and 70s.


Effect-O-Pedia: Modulation

Modulation effects are those effects that change the sound over time. Most modulation effects make use of an LFO (Low Frequency Oscillator), to slowly vary the timbre or amplitude of a signal.

The earliest modulation effects were mechanical in nature:

  • Pipe organs, dating back to the sixteenth century, had devices called tremulants that would vary the wind supply to a section of pipes, creating a tremolo and vibrato effect.
  • Before there were wah-wah pedals, trumpeters and trombonists used toilet plungers to get a similar effect on their instruments.
  • The vibraphone has rotating valves at the end of the resonator tubes, to produce a tremolo effect.
  • The Leslie speaker had a rotating speaker horn on the top, as well as a rotating baffle for the lower speaker. The rotation of the speakers produced small amounts of pitch change via the Doppler effect, which resulted in a chorus/vibrato effect.

Early electronic modulation effects date back to the mid 1930s, but these still made use of some mechanical components. The chorale/vibrato effects of the Hammond B-3 organ are electronic, but the “scanning vibrato” that produced the vibrato signal used a motor to read a signal from different R/C circuits. In the early 1940s, DeArmond had a tremolo device, that relied on a motor that shook a glass tube of conductive fluid. As the fluid sloshed around the tube, it would shunt the signal to ground, resulting in a periodic change in the volume.

Eventually, designers were able to figure out truly electronic modulation effects, that produced moving sound that didn’t rely on things mechanically moving around. These effects were originally built into instruments and amplifiers, but by the late 1960s modulation effects were becoming available as pedals, such that any instrument could be plugged into them. The 1970s resulted in an explosion of modulation effects, and the 1980s saw the rise of rackmounted modulation effects. Today, all of the popular modulation effects of the past century are available in plugin form.

A brief listing of the most commonly found modulation effects:

  • Tremolo: A periodic variation in the volume of the signal.
  • Vibrato: A periodic variation in the pitch of the signal.
    • In the 1950s and 1960s, tremolo and vibrato effects were made available in amplifiers.
    • The terms “tremolo” and “vibrato” were used interchangeably, and often for the wrong effects.
    • The “vibrato” channel of the mid-60s Fender amplifiers produced a change in volume (i.e. tremolo), while the Magnatone amplifiers had true pitch changing vibrato.
    • The “brown” Fenders of the early 60s had an effect that combined both vibrato and tremolo.
  • Chorus: Simulates two or more signals with the same timbre and almost, but not quite, the same pitch. The chorus effect is used to replicate instruments that have 2 or 3 strings tuned in unison (such as 12-string guitar and pian0), as well as multiple instruments or voices playing the same pitch. Most chorus units use one or two time varying delay lines, with the rate and depth of the modulation determining the intensity of the chorus effect.
  • Ensemble: Similar to chorus, but with the goal of simulating a larger orchestra. Ensemble effects usually have 3 or more modulated delay lines, with the modulation being more complex than your typical chorus unit.
  • Flanger: Similar to chorus, but usually with a single short delay line being swept by an LFO, and mixed in with the input signal. The delay lengths and modulation depths are shallower than chorus. The goal of flanging is to produce a swept comb filter effect, where peaks and notches are moving up and down in the audio spectrum.
  • Phaser: Another swept notch/peak effect, but achieved in a different way than flanging. A phaser uses several allpass filters in series, with the turnover frequencies of the allpass filters swept via an LFO, and the output of the series allpass filters mixed in with the input signal. The result has several prominent notches in the frequency spectrum, without the harmonic spacing found in flanging. Phase shifting was a commonly used effect in the 1970s, and was used on the guitars and electric pianos of many soft rockin’ hits.
  • Rotary speaker: A simulation of the Leslie and other rotary speakers. Rotary speakers produce a sound that incorporates both vibrato (from the Doppler shift of the speakers as they move closer to and further from the listener) and tremolo (volume variations as the speaker points towards, and then away from, the listener). The cabinet of a Leslie produces a number of reflections of the speakers. Since these reflections are of a time varying source at different angles, the result is a complicated chorus effect, consisting of a number of reflected signals that have different pitches.


Effect-O-Pedia: Reverb Types

Most reverb plugins and hardware units have a variety of algorithms on tap. These reverb modes tend to stick with a given set of names (hall, plate, chamber, room, etc.), although you will sometimes see more fanciful names used for more “special effect” reverbs. I have written before about how naming reverb algorithms can be somewhat arbitrary, but the names can be convenient shortcuts to quickly getting the sound you want.

It can be useful to separate the reverb types into 3 categories: Acoustic, Mechanical, and Unnatural. Here’s a quick breakdown of the most commonly found reverb types, as well as a few suggested uses for each type.

Acoustic:

Ambience: often refers to a reverb that is mainly early reflections / early energy. Short decay time (0.5 seconds or less), fairly colorless. Ambience algorithms are useful for creating a reverb sound that is felt rather than heard, or a “dry” sound that isn’t as dry as you think that it is. Ambience reverbs often are used to glue a mix together, with various parts fed into the same ambient reverb.

Room: usually used for shorter reverbs, that have more audible reverb than an Ambience algorithm. Room algorithms tend to have some prominent early reflections / early energy, and sound best with a fairly short decay. These algorithms quickly build up echo density. A bit of coloration is expected, as real rooms tend to be a bit colored. Room reverbs work well for drums and acoustic instruments.

Chamber: similar to Room algorithms, but usually with less coloration. Reverb chambers were found in many of the most esteemed recording studios, with each studio noted for its own reverb sound. A chamber reverb will have a fast attack, and a quick build of echo density, but without the distinctive early reflections and resonances found in a room reverb. Some chambers could have fairly long decay times, which tended to be a factor of the size of the chamber and the plaster used in finishing the walls. Chamber reverbs are a good “neutral” verb that can be applied to most anything, but sound especially good on vocals and acoustic instruments.

Hall: bigger and longer than a Room reverb. Real-world concert halls tend to have a decay time in the 1.8 to 2.2 second range, with “slow” early reflections, and a reverb envelope that gradually builds in time and density. The hall algorithms in digital reverbs often have much longer decay times than real-world halls, but they retain the slow build of reverb, as well as the wider, more spacious feel of a concert hall. Hall reverbs are useful for orchestral mixes, vocals in slower songs (and ballads), instrumental solos, synthesizers, and other instruments that sound good with long reverbs.

Cathedral: like a Hall reverb, but much longer attack and decay times. Real-world cathedralss often had a VERY long reverb decay (8 to 13 seconds!), with a slow attack to the reverb – up to 1/2 second. In a real cathedral, you don’t hear any discrete early reflections, as the various nooks and crannies do a great job of diffusing the reverb. Cathedral reverbs are useful for the types of music you would hear in cathedrals, as well as any vocals or instruments that work with extended reverb decay times. Remember that really long reverb times will blur together fast notes, so cathedrals work better with music on the adagio side. Think ambient, or Gregorian chant.

Cave, Stadium: usually synonymous with Cathedral reverbs. Stadium reverbs often have the same sort of annoying slapback echo you would hear from speakers on the opposite side of a station in a stadium.

Mechanical:

Spring: a short to medium length reverb, with a sproingy sound. Real world springs tend to have metallic resonances, tend to be fairly dark, and have a pronounced “DWIP!” sound caused by dispersion. Digital springs often don’t capture the “DWIP” sound of real springs. Springs are useful for making things sound awesomely crappy. Surf guitar, old school electronic music, dub, spaghetti western footsteps, etc.

Plate: a shortish to fairly long reverb. Real world plates are fairly dark, but with a brighter, almost instant attack. Physical plates also have dispersion, which can create a “PEW!” ray gun sound on sharp transients. I have gone into ridiculous levels of detail about physical plate physics and sound, but suffice it to say that plates sound cool on almost anything.

Unnatural:

“Digital” Plate: Yeah, I know I just talked about plates. However, most digital reverbs have “plate” algorithms that don’t really sound like physical plates (i.e. EMT140). The typical digital plate has a fast attack, are BRIGHT, and tend towards a metallic decay, with none of the dispersion found in physical plates. This puts the digital plate into a different category than a mechanical plate, but the digital plates sound great in their own right. Digital plates are great for vocals, drums. and sounding like the 80s in general.

Shimmer: the term commonly used for reverberation that also incorporates pitch shifting. This sound dates back to the early 1980s, when Brian Eno and Daniel Lanois would set up complicated feedback paths using Lexicon hall reverbs, AMS pitch shifters, and Lexicon delays. Nowadays, you can find variants of this algorithm in reverb pedals, as well as ValhallaShimmer, which was purpose built for this sound. Shimmer reverbs are amazing for pads, or for making any instrument sound like an ethereal pad. A little bit of Shimmer goes a long way – this sound tends to dominate a mix!

Bloom: A term used by Keith Barr in the Midiverb II, for a reverb with a VERY slow build time, and an even slower decay. This type of algorithm exploits the artifacts of multiple allpass delays in series (unsurprisingly, I go into some fairly nerdy detail in an older blog post). Bloom reverbs are useful for synths, for ambient music, and any other sort of music where you want time to slow down like it is on the edge of a black hole.

Reverse: Emulates a reverb that has been reversed in time. In the old days, this sound was achieved by recording a track, flipping the tape, playing the tape in reverse while sending it to a chamber or plate, and then reversing the results. Starting in the 1980s, this sound was emulated in real time, using multitap delays in conjunction with short allpass delays to smear things out. Use reverse reverbs when you want to turn a guitar into a shoegazer wall of sound, or to sound like Carrie Anne stuck behind the TV set in Poltergeist.

Gated: A reverb that sounds like a longish room reverb, that is then abruptly cut off. This sound was originally obtained by recording drums in a stone room, compressing the room mikes, and then using a noise gate to truncate the decay once the close-miked drum signals fell below a certain level. Today, this is replicated using digital reverbs, with built in threshold and decay times to control the level at which the reverb cuts out. This is mainly useful for drums, or for putting any sound in the 1980s.

Nonlin: A similar sound to Gated, but obtained via a multitap delay and short diffusors, instead of via actual noise gating. Nonlin reverbs aren’t volume dependent, and can be easier to dial in than a true gated reverb. In many cases, the slope of the Nonlin reverb can be varied, to get sound ranging from a natural room that dies away a bit quickly, to huge gated Phil Collins drums, to reverse reverbs. Nonlin can be used on a wide variety of inputs – vocals, drums, other instruments. Still pretty darned 80s sounding, if you overdo it.


If you have any questions about the types of reverbs listed above, or if I left out your favorite reverb type, feel free to let me know in the comments below!

Effect-O-Pedia: Reverb Chambers

Reverb chambers, or “echo chambers,” are purpose built rooms, that are designed to have a long reverberation time. In modern usage, reverb chambers have a speaker at one end of the room, and a microphone (or pair of microphones) at the opposite end of the room. The sound to be reverberated is sent into the room via the speaker, and the reverberated signal is picked up by the microphones.

The use of specific chambers for generating reverberation can be viewed as dating back to the time of ancient Greece and Rome. The Roman architect and military engineer Marcus Vitruvius Pollio, in his treatise De architecturadescribed the use of “resonating vessels” in the design of theaters. In a recent paper, it has been argued that these vessels extended the reverberation time for performers on stage.

The modern use of reverb chambers in recorded music can be traced back to Bill Putnam’s work. The Harmonicats’ “Peg o’ My Heart,” released in 1947, used a speaker and microphone that Putnam set up in the studio’s bathroom to create a reverberant sound that was much different than the dry studio recordings of the time:

During the 1950s and 1960s, most of the high end recording studios in the United States and United Kingdom incorporated echo chambers into their designs. These custom built echo chambers came in various shapes and sizes, but had many aspects in common:

  • The echo chambers ranged in size from 1000 square feet, up to several thousand square feet. Larger volumes provide a longer reverb time, given that all other factors (wall/floor/roof materials, room humidity, room temperature) are the same.
  • The walls are usually covered with materials that were highly reflective of sound. Tile was common, as was several coats of plaster. As the plaster dried over the course of a few years, the reverberation time would increase.
  • Efforts were made to break up the symmetry of the room, in order to avoid standing waves that would lead to unpleasant resonances in the reverberation. Some room were wedge shaped, with the speaker in the narrow part of the wedge, and the microphones in the wider part of the wedge. Rectangular rooms often had objects (such as standing sewer pipes) placed into them in order to break up standing waves.
  • Once the room was constructed, the speaker and microphones were set into place. The speakers and microphones tended to be aimed towards the closest walls, and away from each other, in order to avoid picking up the direct “un-reverberated” signal. Many reverb chambers have made use of the same speaker and microphones for several decades!

The sound of a reverb chamber is very distinctive, and is difficult to simulate with artificial reverberators:

  • The reverb has a quick onset.
  • Not many early reflections – the initial onset is fairly diffuse
  • The modal density is higher than is found in most artificial reverberators (i.e. digital, spring, plate), but lower than a concert hall. This results in a rich reverb, that is free of metallic resonances and ringing/beating sounds in the decay.
  • The low frequencies will decay at a rate determined by the material of the reverb chamber. Some of the concrete reverb chambers will have a VERY long low frequency reverb decay. In order to compensate for this, it was very common to filter the low frequencies out of the sound sent to the speaker in the reverb chamber. At Abbey Road Studios, it was standard practice to use a passive filter with two frequencies filtered at the corner frequencies of 500Hz and 10,000Hz when patching a chamber on a send from the console.
  • The high frequencies in a reverb chamber have their maximum high frequency decay determined by the humidity of the air. No matter what the size of the reverb chamber was, the RT60 at high frequencies wouldn’t exceed 1.25 to 1.5 seconds. This meant that higher frequency sibilants would decay away relatively quickly.

The lore of echo chambers is strong in the mythology of recording studios. Echo chambers were often used as places for musicians to meditate, or pursue less savory activities. Simon and Garfunkel recorded the backing vocals for “The Only Living Boy in New York” from within an echo chamber, adding to the ethereal sound of that song:

ValhallaPlate: Plate Reverb Tips and Tricks

ValhallaPlate occupies an interesting place in the line up of Valhalla plugins. Earlier Valhalla products were either loosely inspired by existing algorithms in classic digital hardware (VintageVerb and Room), or were wholly original software (FreqEcho). Plate’s foundation was a piece of physical, mechanical hardware, the venerable EMT 140 plate reverb. This 8’x4’ slab of steel is a piece of recording history and ValhallaPlate began as an attempt to model this in software.

Other companies, such as Universal Audio and Waves, have done similar modeling of the EMT140 plate reverb, and been quite successful at it. Valhalla Plate was analyzed and dialed in against a particular EMT 140 here in Seattle at Avast! Recording. This plate has found its way onto the lush vocal stylings of the Fleet Foxes records and is a favorite reverb timbre of Sean’s.

Just as every Neumann U47 sounds different from each other, each EMT 140 has a unique timbre. I think many people when asked what they imagine in their minds a plate reverb to sound like, they see a sheet of steel and think “bright”, or “zingy” (that’s a technical term…). The reality is that most EMT plates are incredibly smooth and if not “dark”, then “not bright”. It’s the perfect timbre to give a vocal presence without exaggerating the upper-mid frequencies. Of course, one can EQ into the plate if you want to excite higher frequencies, or one can EQ after the return to really bring out the “zing”. To me, when left flat, a well maintained and tuned plate is a beautiful sound.

If you haven’t done so, I would encourage you to try the demo of ValhallaPlate and notice how different it is from the “plate” algorithms in VintageVerb and Room, neither of which were based on analyzing a real physical plate. ValhallaPlate is my go-to reverb on most mixes for snare drum and lead vocals. I created a whole wack of presets in Plate, many of which are (I think…) excellent starting points for reverbs on vocals and drums, but also some longer ones that can be useful on synths or to create atmospheres longer than any physical hardware plate would be capable of creating.

Give it a go and feel free to leave comments below!

Modularity in plugin design

A few of our recent blog posts have discussed of minimalism in the design of the Valhalla plugins. Minimalism is a big goal for us at Valhalla DSP. It’s reflected in the GUI style of the plugins, and increasingly in the design of the algorithms themselves.

The drive for minimalism for the Valhalla plugins goes hand in hand with the concept of modularity. Modularity, for plugin design, is the idea that a plugin should focus on the task it is best at, leaving other tasks to other plugins. A plugin can be viewed as a module, that is used as part of a larger system.

Plugins are used within a DAW, or within some other form of plugin host. Most DAWs come with a fairly extensive suite of plugins: EQ, compressors and limiters, simple delays, utility modules; all that good stuff. In addition, the average plugin user owns a fair number of plugins from different companies.

We’re Focusing On What We’re Good At

From our perspective, it makes sense to continue to work with and improve the things we are good at. My experience largely lies with reverbs and delay based processing, as well as modulation effects. I’ve been designing these every working day for the past 18 years. I’ve designed compressors, limiters and EQs in the past, but I don’t consider myself an expert in these types of effects. Meanwhile, there ARE folks who have worked with compressors, limiters and EQs for several decades.

This is where modularity comes in. The Valhalla plugins are designed to focus on the things we are good at. We don’t include EQs, because you already have an EQ. Probably a ton of EQs. And many of these EQs are designed by people who are as fanatical about equalization algorithms as we are about reverbs and delays. Same thing with compressors and limiters. Lots of smart designers out there.

Modularity Aligns With Our Core Beliefs

Our belief in designing plugins as modules for a bigger system ties into several other core beliefs of Valhalla DSP:

  • We don’t think that this is a zero-sum world. Just because you use the Valhalla plugins, doesn’t mean that you won’t use plugins from other people. We feel that if we focus on our specialties, we can happily coexist with other developers that are as equally as passionate about what they do. As we say to each other around here, we don’t need to be the only or the versus. We want to be the AND.
  • DAWs and other plugin hosts are usually designed around the concept of modularity. The plugins included in your favorite DAW are expected to be used in a modular manner, as are 3rd party plugins.
  • People digest ideas easier if they are broken up into smaller chunks. It is tempting to write the Grand Unified Theory plugin, that wraps everything up into one singularity of All Powerful Do Everythingness. These sorts of plugins are fun, but it is often hard to figure out what is going on. It’s like reading a giant run-on post with no paragraphs or punctuation. By breaking out plugins into more atomic units, things become easier to use.
  • Stomp boxes are AWESOME. I love love love effect pedals. Part of this love stems from the simplicity of using effects pedals, as they usually have a small number of controls. Another part of this comes from how using discrete stomp boxes splits up different concepts into different pedals (see above for why chunking up ideas is often a good idea).
  • Send busses are AWESOME. The idea of sending part of an audio track to one or more sends, and running one or more effects on these sends, dates back to the reverb chambers of the 1950s. By running effects on a send bus, you can balance your levels better, send different amounts of different tracks to the same send bus, and use EQ and dynamics processing to shape the sound to your heart’s content. Don Gunn has a great video, showing how to use the Valhalla reverbs on a send bus. This video is useful for ALL reverb plugins, and is also a great illustration on how using several sends to the same reverb can create a better drum sound.

There are limits to modularity. Some signal processing blocks can’t be broken out of the higher level algorithm. For example, many of the Valhalla plugins have filtering blocks (low cut, high cut, damping) that are part of the feedback paths of the plugins. These couldn’t be parted out to external plugins without including an external feedback loop, which would make things far more complicated than just adding a few tone controls.

In general, though, the Valhalla plugins try to keep things as minimal as possible, with the assumption that other functions can be shouldered by other plugins.